Prompt basics
How to Write an AI Image Prompt: A Practical Guide With Examples
Build a clearer image prompt one choice at a time: describe the subject, setting, lighting, style, and composition, then compare the results.
Published: September 29, 2026
By ImagePromptBox Team
12 min read
Writing a better AI image prompt doesn't mean making it as long as possible.
The biggest improvements usually happen when you give the model new visual information: what the subject is, where it is, what the light looks like, how the scene is composed, and what visual style you want.
I tested this by building the same golden retriever prompt across five levels, starting with just two words — a dog — and gradually adding subject details, environment, lighting, composition, and finally photography terms.
The interesting part wasn't just how much better the image became. It was where the improvements happened — and where they started to level off.
Quick Answer
A useful AI image prompt can usually be built from six parts:
Subject + Details/Action + Setting + Lighting + Style + Composition
You don't need all six in every prompt. What matters is adding information that actually changes something visible in the image.
For example:
a doggives the model almost complete freedom.
But:
a fluffy golden retriever sitting among vibrant autumn maple leaves on a soft forest pathcontrols three major parts of the image: the subject, its pose, and the environment.
That's usually more valuable than taking a vague prompt and adding words like 8K, masterpiece, and ultra detailed.
The Prompt Structure I Use
When I need more control over an AI-generated image, I usually think about the prompt in this order:
| Element | What It Controls | Example |
|---|---|---|
| Subject | Main focus of the image | fluffy golden retriever |
| Details / Action | Pose, expression, clothing, behavior | sitting, looking slightly to the side |
| Setting | Location, environment, season | autumn forest path |
| Lighting / Color | Light direction, time, palette, mood | warm golden-hour sunlight |
| Style / Medium | Overall visual treatment | cinematic pet photography |
| Composition | Framing, perspective, depth | shallow depth of field, 85mm lens |
This doesn't need to become a rigid formula. Some prompts need strong lighting instructions but almost no style description. Others depend heavily on composition.
The important question is:
What visual decision am I asking the model to make for me, and what visual decision do I want to control myself?
I used that idea to build the following prompt one layer at a time. The progression follows the six-part structure above.
From “a dog” to a Complete AI Image Prompt
I kept the basic subject—a golden retriever—and progressively added more information.
Here's what changed.
Level 1 — Start With Only the Subject
Prompt:
a dogResult:
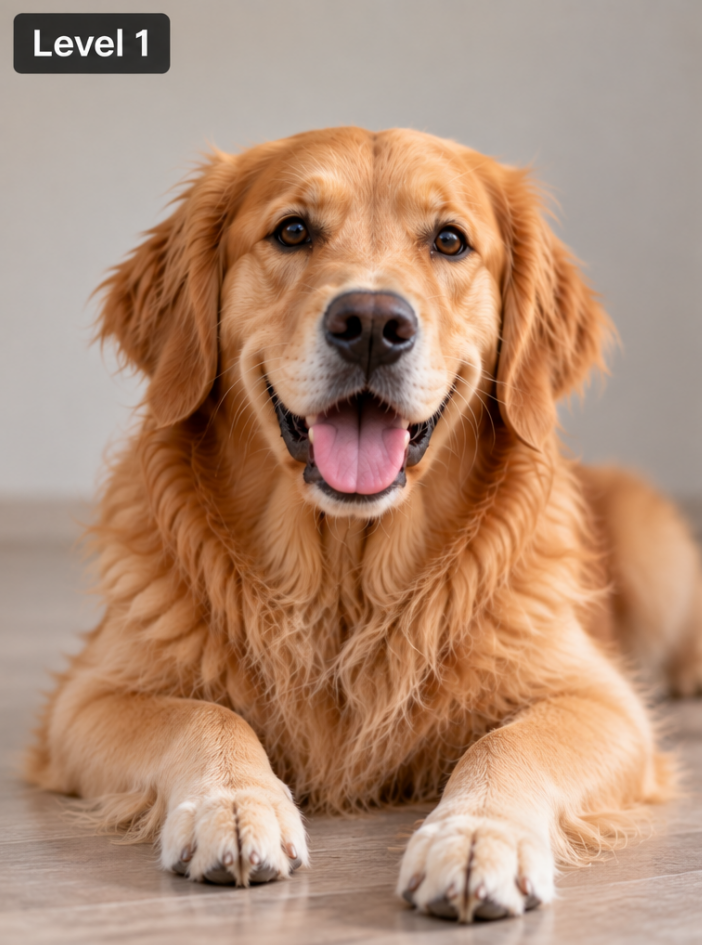
There's technically nothing wrong with this prompt.
The model knows I want a dog. That's about it.
It still has to decide:
- the breed
- pose
- location
- background
- lighting
- camera position
- mood
- photographic or illustrative style
In my result, the model produced a close portrait of a golden retriever lying indoors against a neutral background.
But almost none of those decisions came from my prompt.
Why It Works — and Why It Doesn't
a dog works if I genuinely don't care what kind of dog image I get.
The problem is control.
The model has such a large visual decision space that getting the image I have in mind becomes mostly luck.
What I Noticed
The image itself isn't necessarily bad.
That's an important distinction.
A short prompt doesn't automatically create a bad image. It creates an under-specified image.
If you're exploring ideas, that can actually be useful. If you're trying to reproduce a specific concept, it isn't.
Level 2 — Define the Subject
Prompt:
A fluffy golden retriever sitting outdoors.Result:
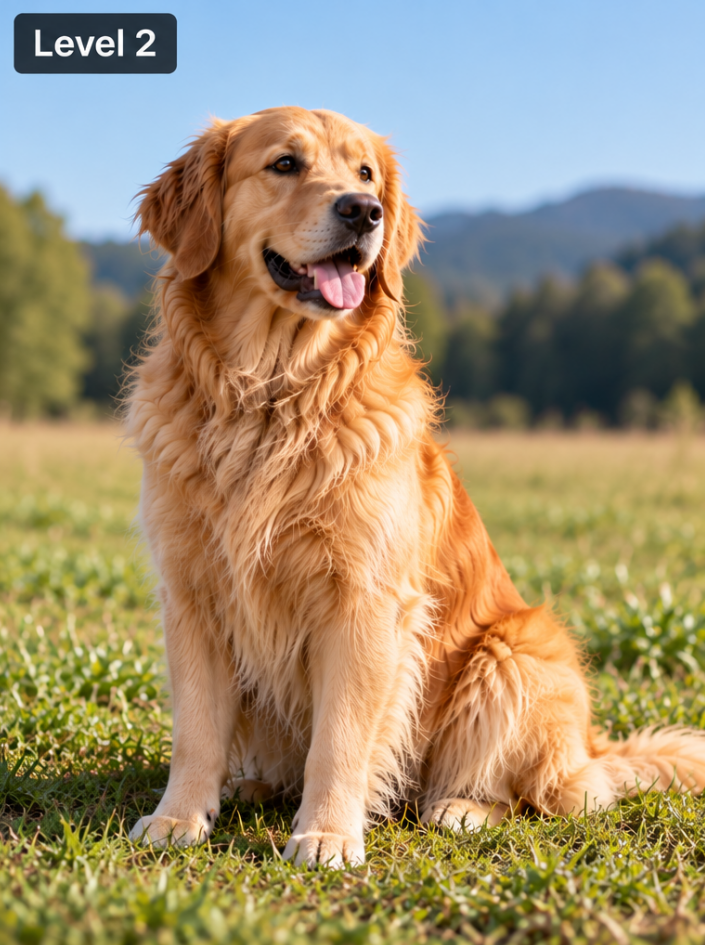
This time I added only a few pieces of information:
golden retrieverfluffysittingoutdoors
Those words immediately eliminate a huge number of possible interpretations. This level was specifically designed to lock down subject identity and pose before controlling the surrounding scene.
Why It Works
Notice that these aren't “quality words.”
Every term communicates something visible.
golden retriever controls breed and appearance.
fluffy affects fur.
sitting affects pose.
outdoors changes the entire environmental category.
The resulting image now has a much clearer identity: a sitting golden retriever in an open grassy environment.
What I Noticed
This was a much larger improvement in control than simply adding generic terms like beautiful, high quality, or 8K.
The background still isn't particularly specific—the model chose grass, trees, mountains and blue sky—but that's expected.
I told it outdoors, not where outdoors.
That's the next layer.
Level 3 — Add a Specific Environment
Prompt:
A fluffy golden retriever sitting among vibrant autumn maple leaves on a soft forest path.Result:
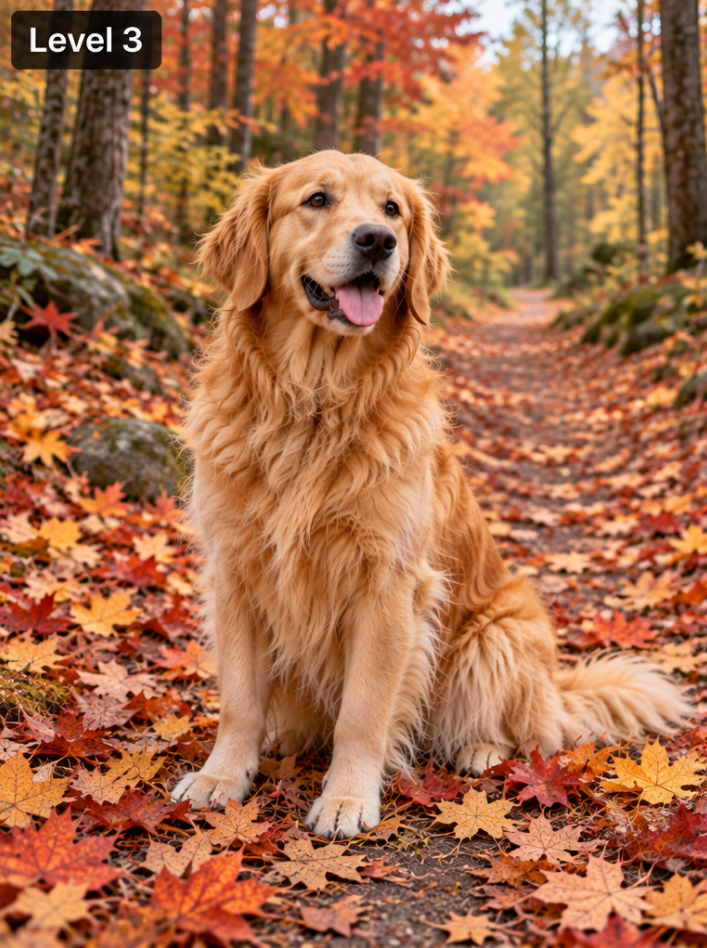
This is where the image changes dramatically.
I added three strong visual ideas:
autumnmaple leavesforest path
Those additions were intended to establish the background, seasonal color palette, and overall environment.
The generic grassy landscape disappears.
Now we have orange and red leaves, tree trunks, a forest path, and a much stronger seasonal identity.
Why It Works
Environment words have enormous visual leverage.
Compare:
sitting outdoorswith:
sitting among vibrant autumn maple leaves on a soft forest pathThe second version doesn't merely add detail.
It changes a large percentage of the pixels in the image.
That's how I think about useful prompt detail: does this phrase introduce a meaningful visual decision?
What I Noticed
Level 2 → Level 3 produced one of the biggest jumps in the entire test.
This is why I wouldn't tell someone to “make your prompt longer.”
I'd tell them to make it more visually specific.
Adding a concrete environment changed far more than adding several abstract quality adjectives would have.
Level 4 — Control Lighting, Color, Mood, and Expression
Now I pushed the prompt much further:
Cinematic seasonal pet portrait of a fluffy golden retriever sitting among vibrant autumn maple leaves on a soft forest path, warm golden hour sunlight filtering through the trees, rich orange and crimson foliage backdrop with gentle bokeh, the dog looking slightly to the side with calm curious eyes.Result:
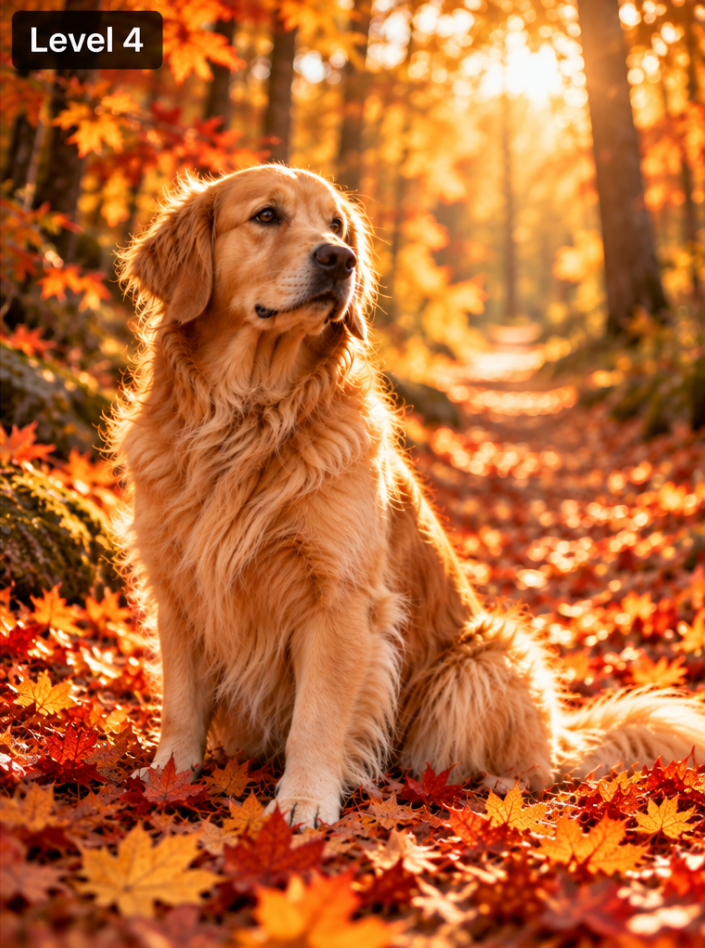
The subject and location haven't fundamentally changed.
But the image feels very different.
What Changed
I introduced:
cinematicgolden hourorange and crimsongentle bokehlooking slightly to the sidecalm curious eyes
These additions were deliberately aimed at moving the result from a generic autumn dog photograph toward a designed seasonal pet portrait.
Why It Works
At this point, I'm no longer telling the model mainly what objects should exist.
I'm controlling how those objects should look.
golden hour sunlight filtering through the trees influences the direction, warmth, and character of the light.
orange and crimson reinforces the palette.
gentle bokeh changes how the background should be rendered.
looking slightly to the side gives the portrait a more deliberate pose.
These are high-value details because each one maps to something visible.
What I Noticed
Lighting was particularly powerful.
The jump from Level 3 to Level 4 didn't require changing the subject or location. Yet the golden backlight makes the final scene feel considerably more intentional.
This is something I repeatedly look for when refining prompts:
Once the subject and environment are right, lighting often gives you more visual improvement than adding more subject adjectives.
Level 5 — Add Photography and Quality Terms
Finally, I used the complete prompt:
Cinematic seasonal pet portrait of a fluffy golden retriever sitting among vibrant autumn maple leaves on a soft forest path, warm golden hour sunlight filtering through the trees, rich orange and crimson foliage backdrop with gentle bokeh, the dog looking slightly to the side with calm curious eyes, outdoor pet photography, nature and pet harmony, highly detailed fur texture, shallow depth of field, 85mm lens, photorealistic, ultra sharp, intricate details, 8KResult:
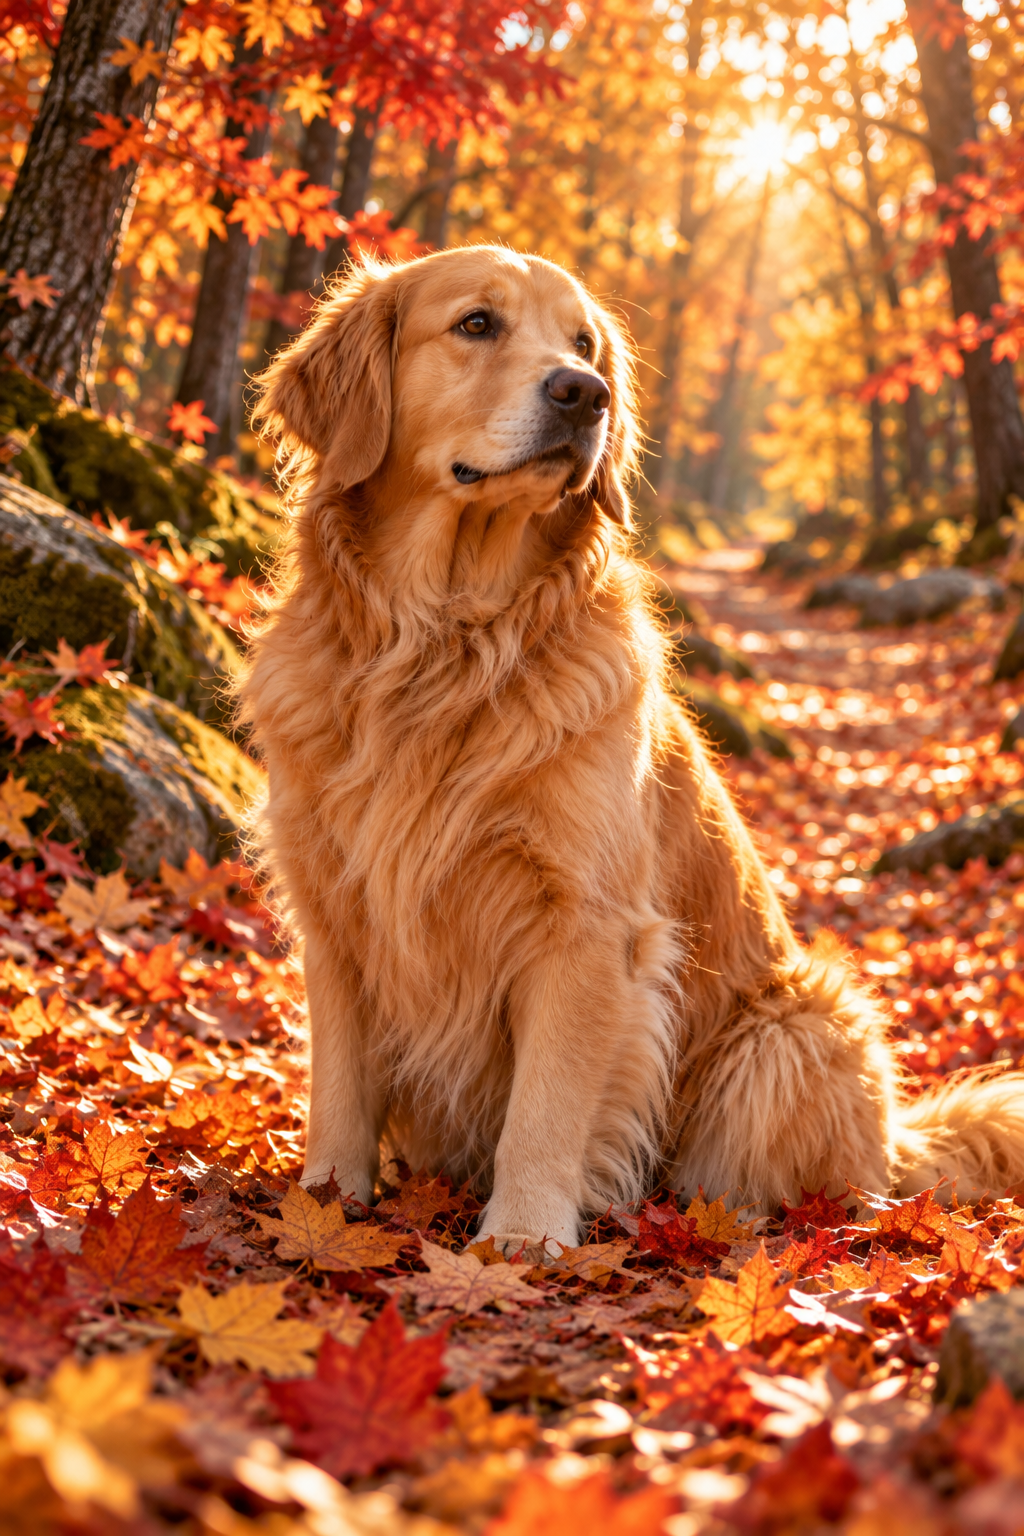
The final additions include:
outdoor pet photographyhighly detailed fur textureshallow depth of field85mm lensphotorealisticultra sharpintricate details8K
These were primarily photography and quality-control terms rather than new scene information.
And this produced the most interesting result in the test.
What I Noticed: Level 5 Wasn't a Huge Leap
Level 4 → Level 5 was noticeably less dramatic than the earlier transitions. That's also the main observation recorded in my test notes.
Compare the progression:
Level 1 → 2
dog → fluffy golden retriever sitting outdoors
Major increase in subject control.
Level 2 → 3
outdoors → autumn maple leaves + forest path
Major change in environment and color.
Level 3 → 4
golden hour + orange/crimson + bokeh + expression
Major change in lighting and mood.
Level 4 → 5
85mm + ultra sharp + intricate details + 8K
Much smaller conceptual change.
That's the part of this experiment I find most useful.
The prompt became considerably longer, but the amount of new visual information didn't increase at the same rate.
Before & After: What Actually Made the Difference?
If I reduce the five prompts to their essential changes, the progression looks like this:
Before
a dogThe AI decides almost everything.
Better
A fluffy golden retriever sitting outdoors.Now I control the subject and pose.
Better Again
A fluffy golden retriever sitting among vibrant autumn maple leaves on a soft forest path.Now I control the subject and environment.
Much More Controlled
...warm golden hour sunlight filtering through the trees, rich orange and crimson foliage backdrop with gentle bokeh...Now I'm also directing light, color and mood.
Final Polish
...highly detailed fur texture, shallow depth of field, 85mm lens, photorealistic, ultra sharp...Now I'm refining photographic treatment rather than fundamentally redesigning the scene.
Why This Works
Each of the first four stages answers a major unanswered visual question:
What is it? What is it doing? Where is it? What does the light look like? How should the image feel?
Only after those decisions are made do technical and quality terms become useful refinements.
Common Mistakes When Writing AI Image Prompts
1. Adding Quality Words Before Visual Information
A prompt like:
a dog, masterpiece, best quality, 8K, ultra detailed, highly detailed, amazingis longer than:
a golden retriever sitting on an autumn forest pathbut contains less useful scene information.
Do This Instead
Prioritize:
subject → environment → lighting → composition
before piling on quality terms.
2. Using Vague Style Words
Terms such as:
cinematiccan help, but they're broad.
Compare:
cinematic dog portraitwith:
warm golden-hour backlight filtering through autumn trees, shallow depth of fieldThe second tells the model what “cinematic” is supposed to look like in this particular image.
Do This Instead
Use abstract style words as shorthand, then support them with concrete visual instructions.
3. Trying to Control Everything at Once
If you change the subject, setting, lighting, lens, color palette and style simultaneously, it's difficult to tell which instruction actually improved the image.
That's why the five-level test was useful.
Each stage introduced a relatively clear new layer.
Do This Instead
Start with the biggest visual decisions and add one category at a time.
4. Assuming Longer Means Better
This test is a good example of why that isn't always true.
Level 5 contains substantially more words than Level 4, but the visual improvement is less dramatic than some earlier stages.
More words help only when they provide useful information.
Do This Instead
When editing a prompt, ask:
What will this phrase actually change in the image?
If you can't answer that question, try removing it.
5. Treating “8K” as a Substitute for Art Direction
8K, ultra sharp, and highly detailed don't tell the model where the dog is, what the lighting looks like, or how the shot should be composed.
They can't replace art direction.
I treat these terms as finishing instructions—not the foundation of the prompt.
A Simple AI Image Prompt Template
For most images, this is a useful starting structure:
[Subject] + [Action/Details] + [Setting] + [Lighting/Color] + [Style] + [Composition]
For example:
A fluffy golden retriever sitting on an autumn forest path, surrounded by orange and crimson maple leaves, warm golden-hour sunlight filtering through the trees, cinematic pet photography, eye-level portrait with shallow depth of field.Notice what's missing:
masterpiece best quality award winning 16K insane details
You can experiment with those later.
First make sure the prompt describes the image you actually want.
What I'd Do Differently
The biggest lesson from this five-level test is that I wouldn't start by trying to write the “perfect” 60-word prompt.
I'd build it.
Start with:
Subject
Then add:
Subject + environment
Then:
Subject + environment + lighting
Then decide whether style and composition need more control.
Only after that would I add technical photography or quality terms.
The Level 1 → Level 5 progression also showed something I think gets lost in a lot of AI prompt guides:
Prompt quality isn't the same thing as prompt length.
The biggest improvements came from adding new visual information. Once the subject, environment, lighting, color, and composition were already well defined, piling on more quality terms produced diminishing returns.
So instead of asking:
“How can I make this prompt more detailed?”
I think the more useful question is:
“What important visual decision have I not described yet?”
That's usually where the next meaningful improvement comes from.
Frequently Asked Questions
How long should an AI image prompt be?
Long enough to describe the image you actually want, and no longer.
In this test the longest prompt was the one with the smallest visible change, so word count isn't a useful target on its own. When I'm editing a prompt, I count new visual decisions instead of words: if a phrase doesn't add something the model would otherwise have to invent, it isn't earning its place.
Do I need all six parts every time?
No. The six parts are a checklist to run through, not a required format.
Plenty of prompts need a strong lighting instruction and almost no style description, and some depend mostly on composition. The parts are there so you notice when you've left one of them to chance — not so every prompt ends up the same length.
Which part of the prompt should I write first?
Subject, then setting.
Those two account for the largest share of the image, and they're the hardest things to fix afterwards, because a wrong breed or a wrong location can't be corrected by adding adjectives. Get those settled, then decide on light, then decide on photographic treatment.
Do quality terms like `8K` and `ultra sharp` actually improve the image?
I couldn't demonstrate that they did in this test — Level 4 → Level 5 was the smallest change in the run, and Level 5 is where all of them were added.
I also can't credit or blame any single term, because each level was generated separately rather than resuming from the previous image. The whole picture was re-rolled each time, which is a limitation of how I set this up.
What I can say is that they behave like finishing instructions. They refine an image whose subject, place, and light are already decided. They don't rescue one where those are still vague.
Does the order of the words inside the prompt matter?
That hasn't been tested here, so I'd treat the six-part order in this article as a writing habit rather than a measured effect.
Its practical value is that it stops me from reaching the end of a prompt and realizing I never said where the light was coming from — which is exactly what happened at Level 3.
Will the same prompt behave the same way in Midjourney, FLUX, or another model?
I don't know, because every image here came from ChatGPT Image 2 and I didn't run the same five prompts anywhere else.
Prompt interpretation can differ between models, so if the progression matters to you, run the same prompts on your own model and compare the outputs rather than assuming this ordering transfers. That comparison has not been done on this site.